
Boats age like houses. With time and major miles on the ocean, combined with UV and gravity, many boats sooner or later need their windows rebedded. The first video I saw on the topic was Gone with the Wynns when they rebedded the salon windows of their Leopard catamaran. The fact of the matter is, we’ve seen several cruisers re-bedding windows on a broad range of production monohulls and catamarans, often having completed significant nautical miles. So, after one of our aft picture windows started loosening when we were in Costa Rica, we were luckily in a Marina Papagayo with access to the all the materials necessary to rebed it.
How do you know if you need to rebed your windows?
Last year we had the opportunity to visit the Lagoon factory in France. We were thrilled to have lunch with the designer of our Lagoon 421 catamaran, Bruno Belmont, aka Mister Lagoon. Bruno has been the key designer on most of Lagoon’s catamarans over the past 10 years. Bruno explained that if you push hard on the window from the inside and it doesn’t creak or move in anyway, best to leave them be. But, should they have any movement, it is time to rebed them.
We did a LOT of research into what Lagoon uses at the factory, and the pros and cons of various materials that are more easily available to us mortals. And, after choosing to replace the remaining three windows in anticipation of our Pacific passage, we feel we got the system down.
Having a window fall out of your boat at sea is a very scary thing, so hopefully this How To blog will motivate some of you on the fence to bite the bullet, and just get it done. Frankly. it can be a rather fun and creative process with the right tools, in the right place.
Tools & Materials
Listed roughly in order used:
- Sun protection for the space next to the window if needed
- Tarp for the finger pier to protect it from materials and us from the heat of the concrete
- 9 mm box knife
- 1.5″ wide chisel and hammer
- Caulk removal tool
- Trashbag
- Handheld vacuum
- Ryobi triangle sanding head on oscillating tool
- 60/80/120 grit sandpaper
- Caulk gun (we used a Ryobi battery operated one and it was the best decision EVER!)
- 1 quart acetone
- Roll of paper towels
- Trashbag or heavy plastic to cover window when drying
- 1 roll 1″ blue tape
- 1 roll 2″ blue tape
- 1 green scrubby pad
- 1 brown scubby pad (rougher)
- 2 1 1/2″ foam or regular paint brush per window
- Plastic caulk smoother (typically organge)
- Roughly 1″ wide by 1/4″ thick shims made from old fiberglass, wood, what ever material
- Silicon caulk edges of various sizes (outside was a larger round edge, inside border was a much narrower rounded corner)
- Spray bottle with soapy water
Glues
- 1.5 tubes of black SIKA 295UV per window
- 1 bottle of SIKA 206 primer is sufficient for all 4 windows
- 1 tube of white SIKAsil-C per window, mostly for the outside bead and some for the inside bead
- 1 can of quality white oil-based spraypaint is sufficient for 2 windows
Since we planned this job in advance, we chose to ship/order the recommended adhesives and know that this is not always possible.
Vinyl privacy screen
Over time, the white or black privacy screen sticker wears off for a range of reasons. Some people like the privacy screens, others don’t. On some models, Lagoon has the stickers, on others it doesn’t. The 420/421 models have them. We used VViViD One Way Perforated Window Vinyl Privacy Wrap Film Roll Decal Sheet DIY Easy to Use Air-Release Adhesive (10ft x 54 Inch) as a replacement.
Process
Window removal
- Create a comfortable working environment with sun shade, tarps to cover finger pier, move the hull as close to the finger pier as possible and keep a fender near the window to hold on to some times
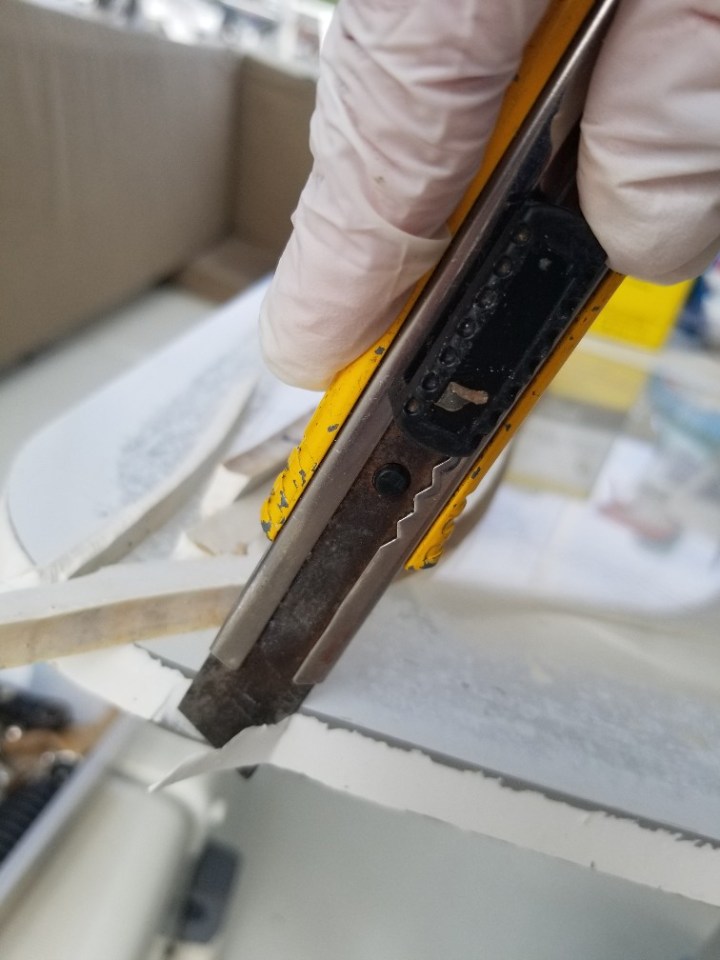
- Insert the box cutter deep into the white silicon (about 1.5″) and pull along the window edge. Do the same along the fiberglass edge of the silicon.
- Cut a vertical slit between the two, insert a flat head screw driver in to dig out the edge of the silicon and pull. Most of the old white silicon can be removed this way.
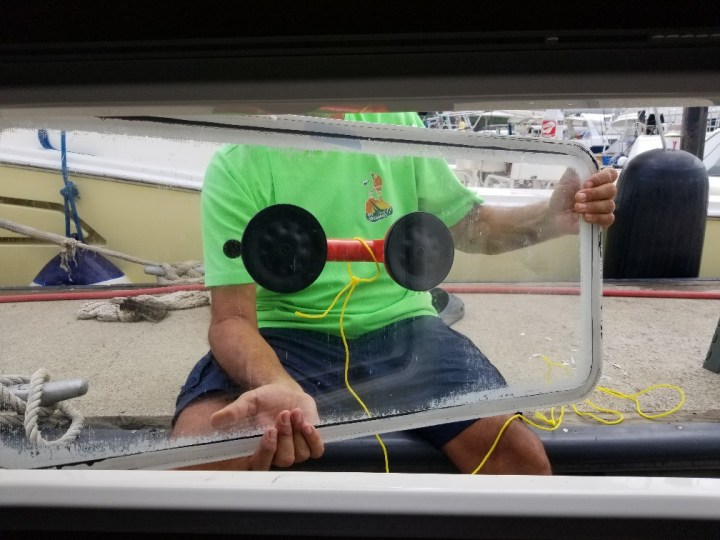
- Attach the heavy duty suction cup handle on the outside of the window with a paracord or light safety line attached
- I pushed the window edges from inside the boat to find an area that has the most give. Once that area is identified, it is easy to push along it slowly until the window is almost out.
- Don remained on the outside, and grasping the handle, he carefully received the window from me placing it on the tarp.
Hull preparation for re-bedding window
- While we did this together on the first window, we realized it was better if Don did the window frame prep while I did the window preparation.
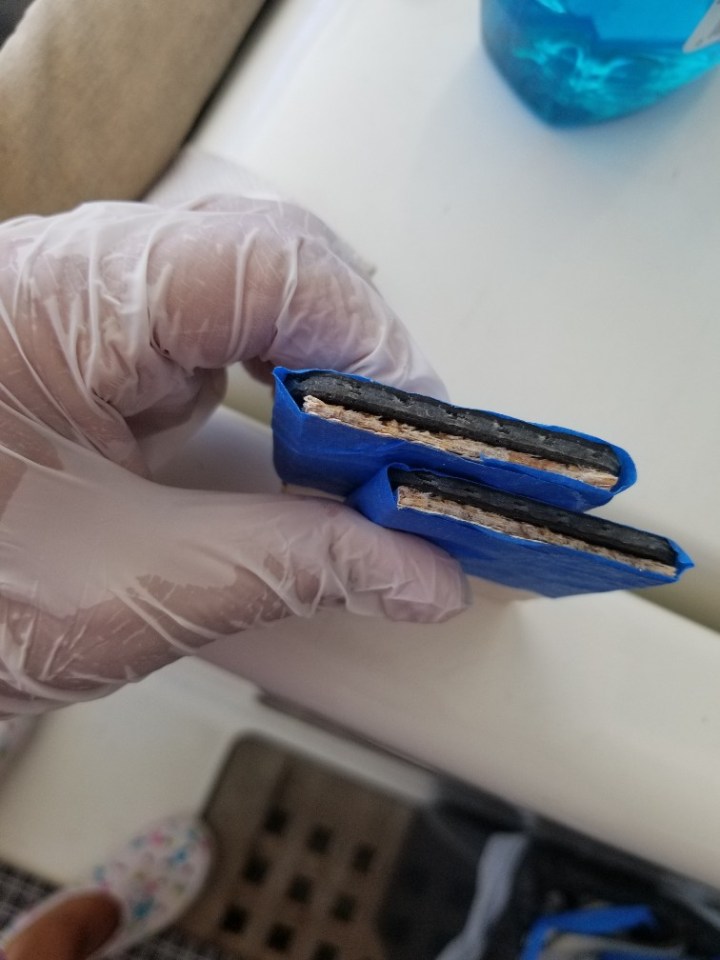
- Don removed the old black Sika 295 by angling a chisel under it and gently hammering it off, being careful not to get into the gelcoat. From time to time, he took vice grips to pull the Sika along.
- Then, what’s left on the frame has to be removed as well. We found the battery operated triangle sander (Ryobi occilating tool) was the most efficient way to remove it, starting with 60 grit and changing to 120 grit as it gets cleaner.
- Once all of the silicon and the Sika 295 were removed, clean the area with acetone making sure you don’t let it drip down the hull side.
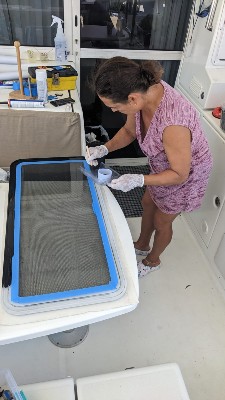
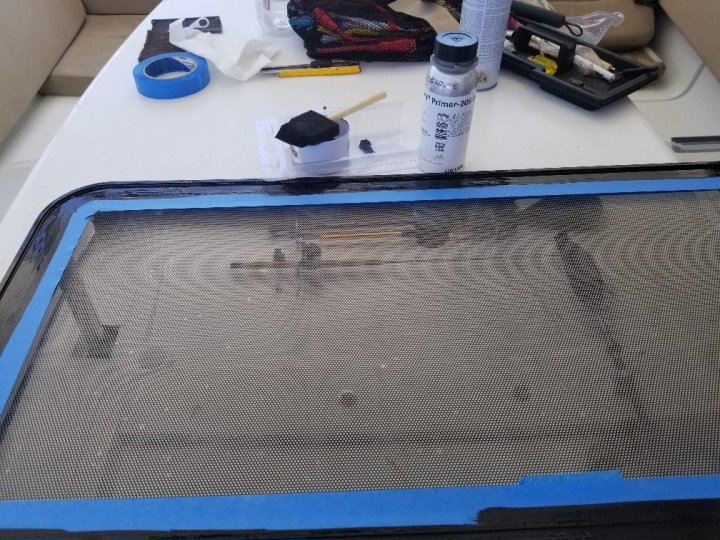
- Place blue tape on the inside white plastic frame to protect from excess black Sika 295 getting on the insert. And, place tape outside the curve of the frame for when too much gets out of the caulk gun.
Window vinyl removal & preparation
- Set up shop somewhere comfortable with rain/sun protection. I set up to work in the cockpit.
- Place the window interior side face down on the table.
- Take the 2″ blue tape, and mask off the solid white frame at the windows edge. You want to keep this white to protect the Sika from UV, regardless of whether you choose to reinstall the vinyl stickers or not. To the extent possible, try to cut curved corners like the original but it’s not critical if you’re putting new stickers on.
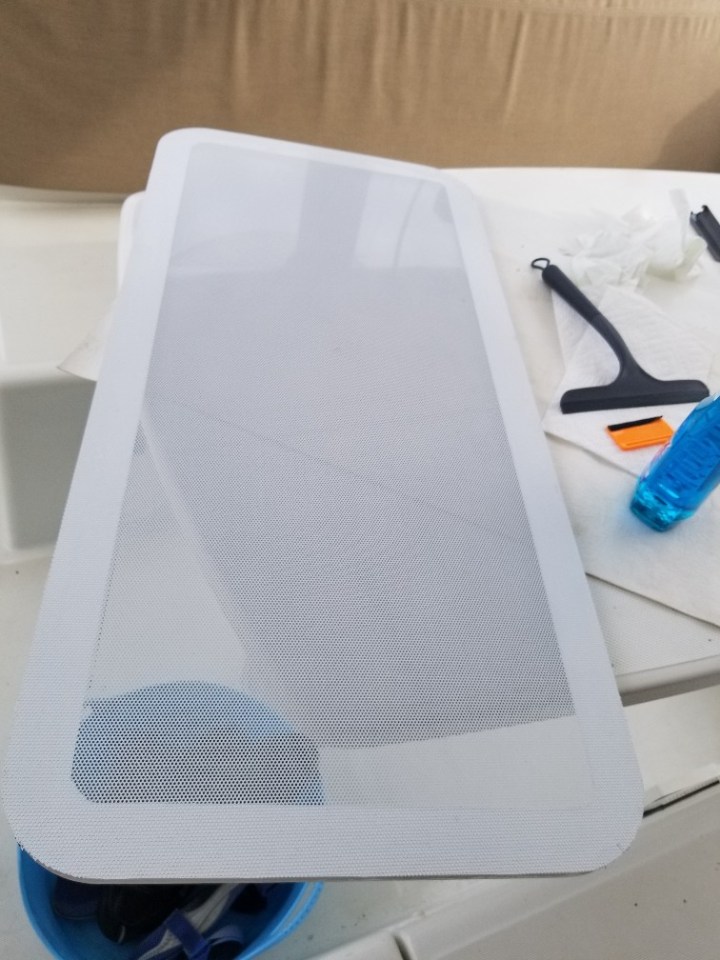
- For removal of the vinyl stickers, Lagoon recommends the following: use plenty of paper towels, dilute Acetone, and rub the vinyl off the window.
- Once removed, wipe down window with regular window cleaner
- Having first and unsuccessfully trying a plastic scraper and then a heat gun, I was thrilled to know it was OK to use Acetone on the window (I guess it’s glass not acrylic). This official Lagoon recommendation was shared in a Comment in the Lagoon Owners Facebook page (which I unfortunately can’t find right now).
- Remove the blue tape from the solid white frame edge and now cover the area that has just been cleaned with 2″ wide tape so you can repaint the white frame.
- Lightly sand the white frame with brown scrubbie pad and/or 80 or 120 grit sand paper to remove any paint/vinyl that’s loose.
- Put acetone on a paper towel and give the entire frame edge a gentle wipe to prep for the new paint.
- Tape the depth edge of the window so it doesn’t get extra paint on it.
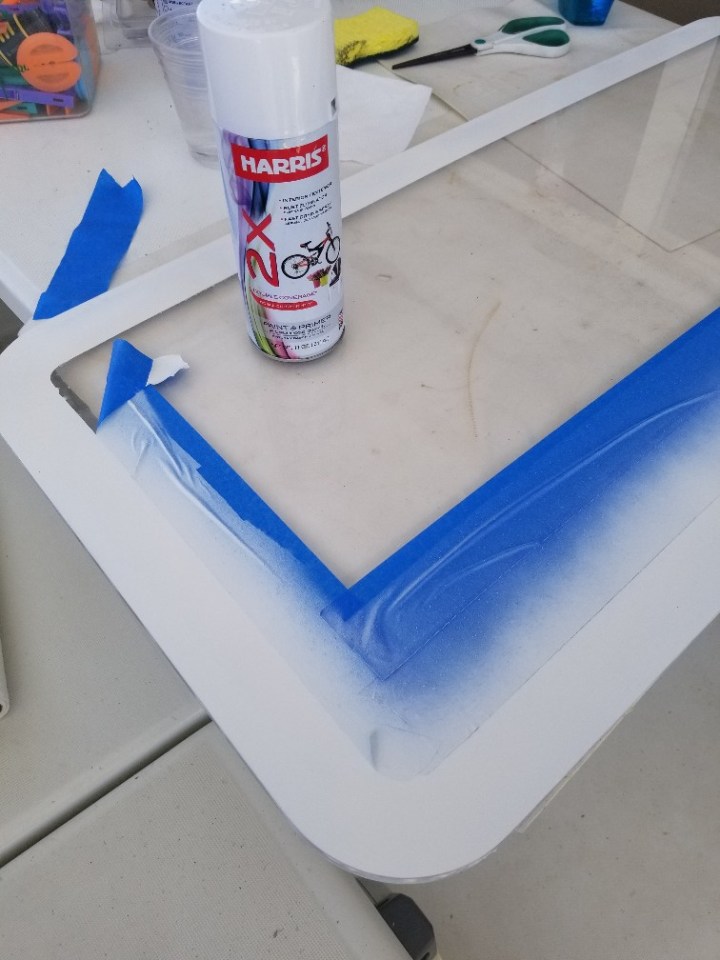
Window frame painting & vinyl application
- Bring the window to an area where you can spray paint. Bring a tarp with you to block any wind debris and overspray.
- Try to set the window up so it’s horizontal and follow the spray can instructions. Spray a few eg 3-4 light coats of paint on the white frame edging and let dry.
- Bring back to boat and remove blue tape from the center of the window.
- Give the window one last clean with window cleaner in preparation for the vinyl privacy sticker.
- Cut a rectangle of the sticker that’s at least 1/2″ to 1″ bigger than the window frame.
- Spray the window generously with soapy water.
- Don and I both started to remove the sticker edge on the same side, so I could align one edge on the window making sure the dots were in line with the edge.
- Slowly peeling the sticker off the backing, use the large squeegy to gently press air bubbles out so it is flat. If there are ripples, remove and reposition the area until you’re satisfied.
- Squeegy the window until most of the soapy water is removed and all air bubbles and wrinkles are smoothed out.
- Let dry and then use box knife to cut excess from around the window edge.

Window primer application
- With the external side of the window facing down, determine if another abrasion of the brown scrubby pad or sand paper is needed to remove last vestiges of the old Sika 206 from the window gutter well and area around it.
- Wipe the depth of the window and inside window gutter well with acetone to prep for best adherance of the Sika 205.
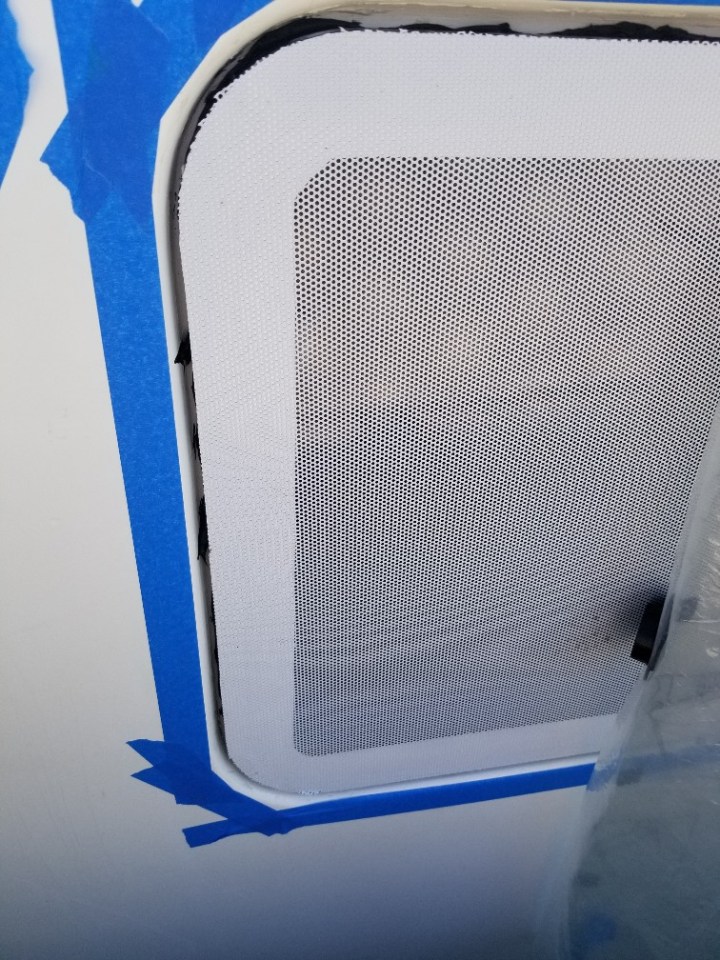
- Place 1″ blue tape 1-2 mm closer to the gutter from the white painted frame to protect the Sika primer from showing through the window white frame when installed.
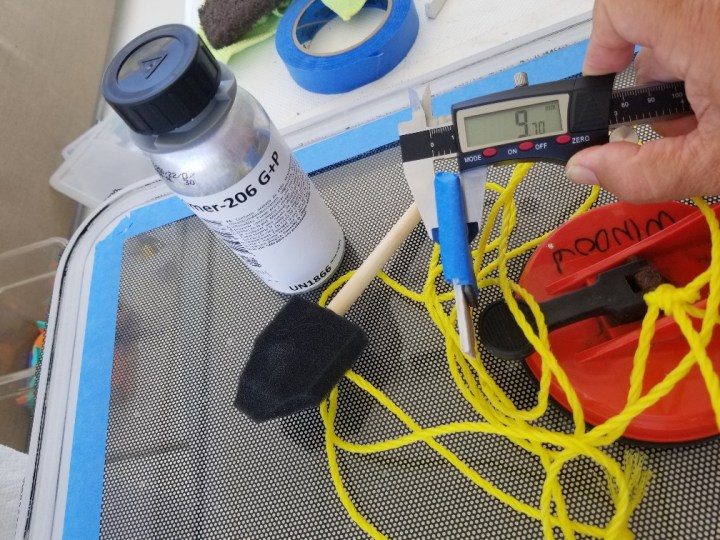
- Put on two layers of gloves, put a 1/4 cup of Sika 206 into a disposible container placed very close to the window.
- Dip the foam brush into the Sika 206, and puddle the primer in the window gutter well, pulling the excess primer to the taped edge of the window and across the top of the 1/4″ lip of the gutter. Do not reapply!
- Per the instructions, you have around to wait 10 minutes and no more than 2 hours after application of Sika 206 primer to apply the Sika 295UV for proper adhesion.
Adhesive application & window installation
- Bring the window to the finger pier, place it external side face down on the tarp.
- Put the Sika 295 in the glue gun, cut the tip for roughly a 2 mm bead.
- Squeeze the Sika 295 in the gutter, up to the edge tape, and on the 1/4″ window edge, be generous.
- Use the plastic caulk spreader to make sure there aren’t very large valleys or bumps and bring to the 1/4″ edge in case there were areas that got missed. Clean excess off the spreader with towel paper, no need for acetone.
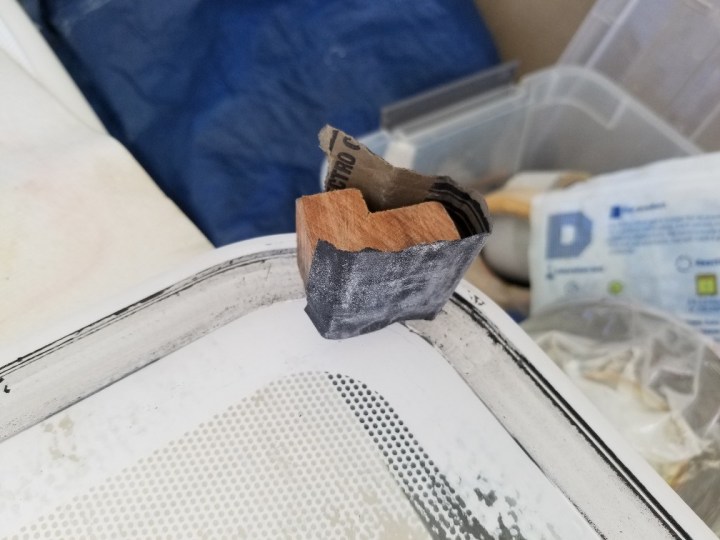
- Have the window shims ready for placement. We only used shims at the bottom and eyeballed the window centered left to right.
- Here is where it’s good to be comfortable being close with your partner. Don held the window, I sat right behind him with shims in hand. As he brought the window toward the boat, I directed for him to move it more to the left or right. Before he pushed the window in, I placed the two shims under the window by reaching under his arms. Creative perfectionists might find a way to install shims for left and right centering, but we eye balled it for close enough.
- Once pushed in, you want to keep around 20 lbs of pressure on, so I stayed with clean feet pushing the window in and held on to the fender line nearby for contra.
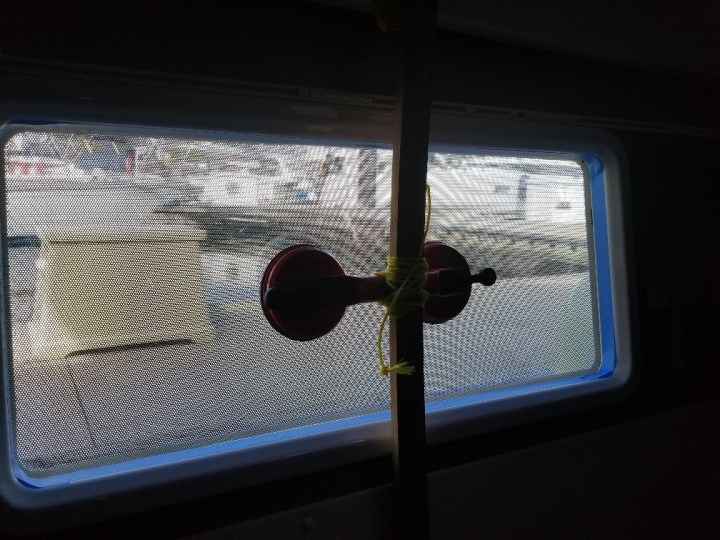
- Don went inside to attach the heavy duty suction cup hand rail to the inside of the window. He then tied the wood stick to the hand hold that spanned the length of the window wall and lashed the suction cup to the wood rail. This kept the window in tight while the SIka 295 dried over the next 24 hours. Check the Sika instructions for your temperature for how long it takes to fully dry.
- Cover the window with a plastic bag and leave the window as is for 1 day in the tropics, or more per manufacture recommendations for your temperature.
- Remove the heavy duty handle and wood.
Silicon edging & celebrations
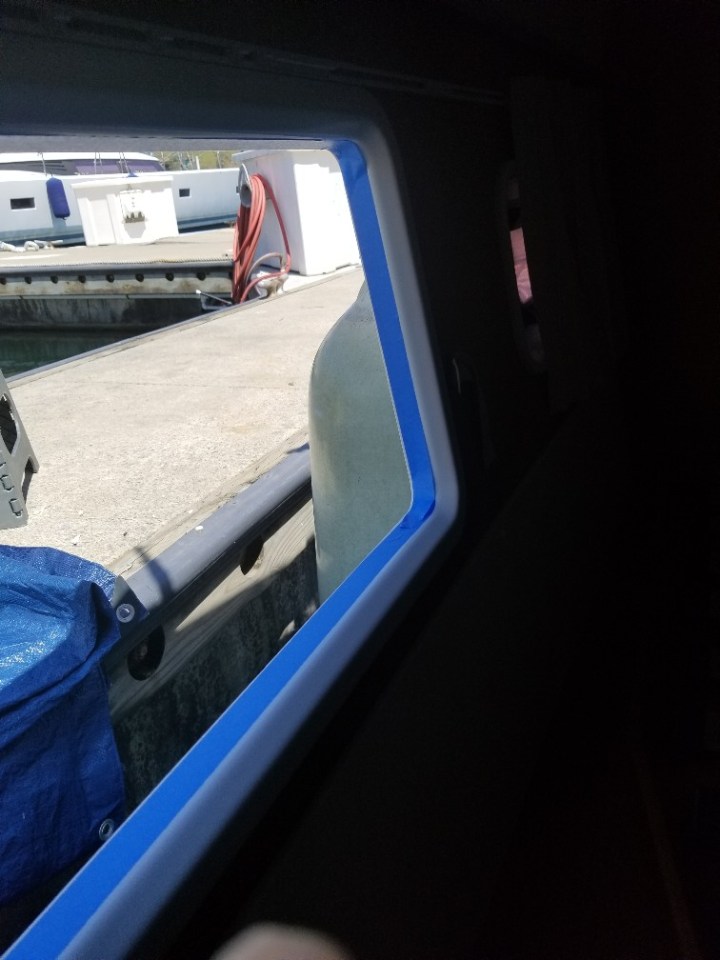
- Once the Sika 295 is dry, it’s time to add a bead of white Sikasil-C silicon to the exterior window edge as well as the interior edge. Do not do this before the Sika 295 is dry. Sika warns that silicon can interfere with adhesion of other adhesives.
- If there is excess Sika 295 that seeped into the exterior or interior gutter where the silicon will be placed, use the box knife to cut any off that might be visible.
- Apply 1″ blue tape around the exterior edge of the window frame inside and outside to protect the areas from over spray of the silicon.
- Put on 2 layers of gloves again. Note: you will waste a lot of silicon to get a perfect edge, just warning you. Using the caulk gun, add a small bead of silicon to the innermost area aroiund the window, and then follow up with thicker layer of silicon on top to completely fill the gap which is rather large and deep.
- Gloved as well, I then took the blue silicon edge tool that had the H3 wide curve, and removed the excess. I needed to stop every 2″ or so, to wipe off the excess. Every once in a while, Don needed to add a bit more to an area that couldn’t otherwise be backfilled. When done properly, there’s no need to spray with soapy water to get a nice skin.
- Remove blue tape and wipe anyt exxcess with paper towel.
- Go inside, and rinse and repeat except this time use a much narrower silicon edge and use much less silicon as the bead it easily 1/4 the depth and width.
- Cover the window with a plastic bag and leave the window as is for 2 days in the tropics, or more per manufacture recommendations for your temperature.
- Have a drink and celebrate a job well done!

Captain Nez Mystery Series
If you wish author updates and a free downloadable copy of the first Captain Nez cozy sailing mystery, sign up for the Captain Nez Posse here!
And, click on any of the social media icons below to Follow my progress on the Captain Nez mystery series on social media.
I’d love you to join me on my path to become a cozy sailing mystery writer.
This is just amazing and so impressive! Congrats Captains!